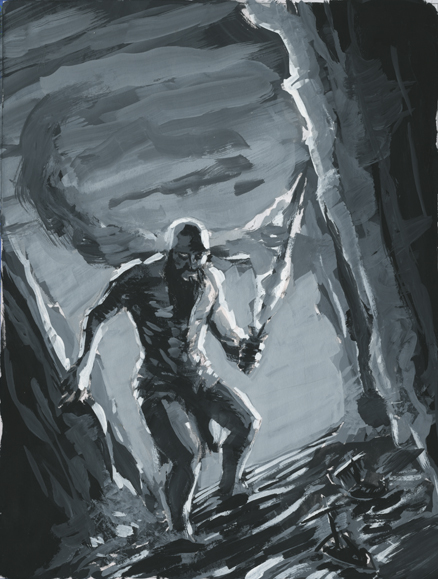
It’s been a while since I’ve shown some process shots of my art so let’s take a look at an older gouache painting. The painting assignment restricted my palette to just black and white.
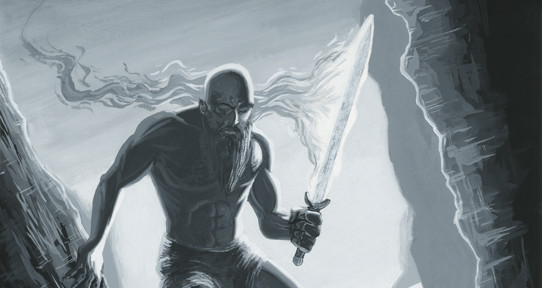
Here’s the painting:
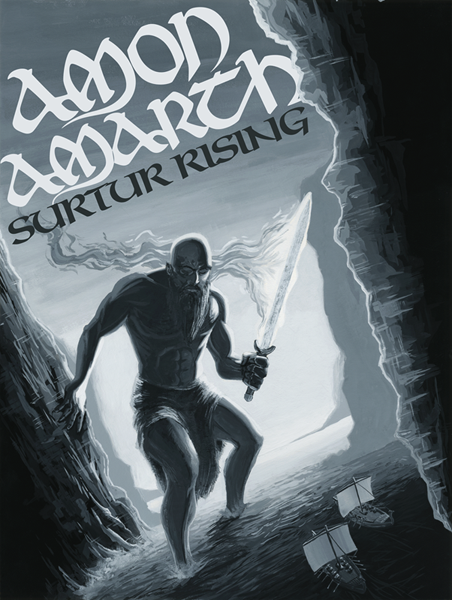 Now you may be asking yourself “who or what is Surtur?” or “what the heck is Amon Amarth?”
Surtur (also known as Surtr) is a jötunn (aka a giant) from Norse mythology (aka Scandinavian mythology). He also has a fiery sword. That’s pretty much all you need to know. Amon Amarth is a band that doesn’t like to be labelled “viking metal”. They sing (or growl or whatever you want to call it) about vikings. They have viking themed albums. They love norse mythology. Whatever. They are a melodic death metal band. One of their albums is Surtur Rising.
Now onto the process:
Instead of doing a grisly and dark illustration that is typically associated with bands like Amon Amarth, I decided to do a “comicy” style illustration. Side note: this painting is probably the first gouache painting I did since I took the color theory class years ago.
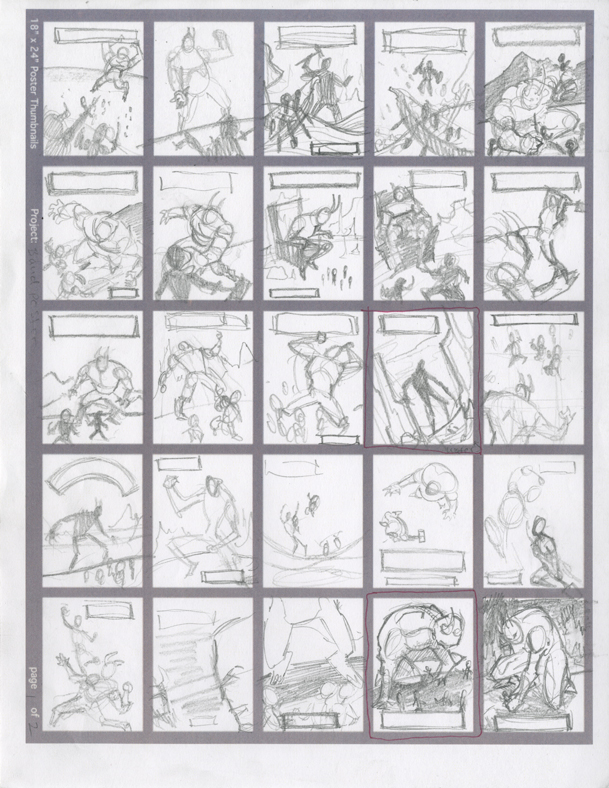
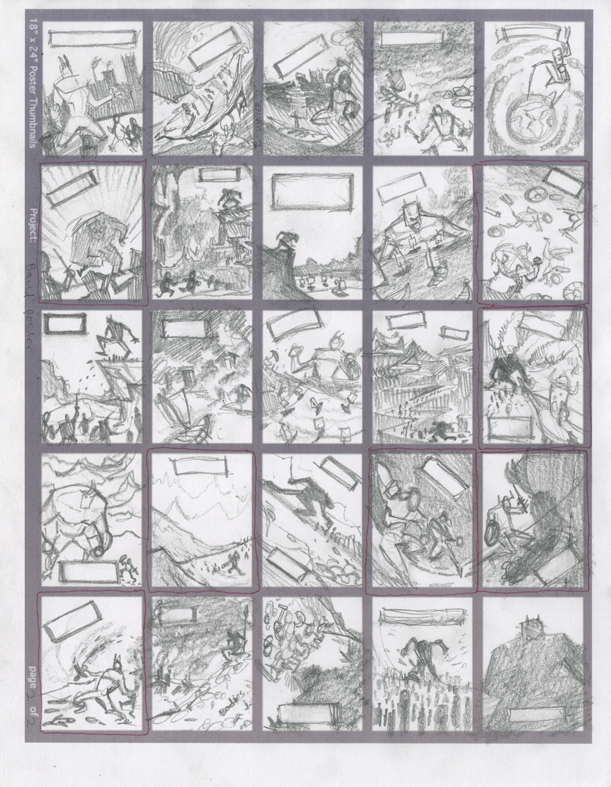
To begin, here are the 50 thumbnails I did prior to deciding on a composition (each thumbnail is about 1.375″ x 1.875″). Because the illustration was going to be a poster I had to also think about text placement when designing my composition.
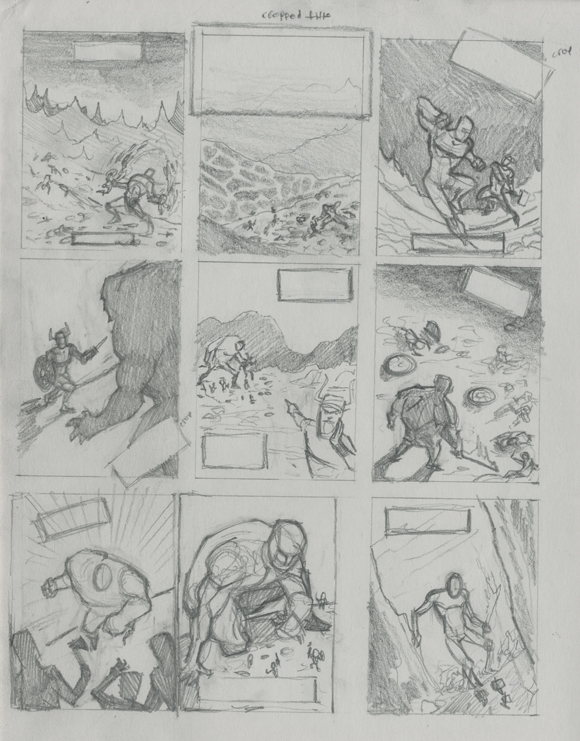
 Sometimes I’m kind of undecided about things, maybe (see what I did there?). I chose some thumbnails that I especially liked from the 50 above and drew some larger refined thumbnail drawings. Each thumbnail is 2.25″ x 3″. I drew them on gray paper because I had some gray paper left over from when I operated an offset printer in high school and I figured “why not?” (don’t answer that).
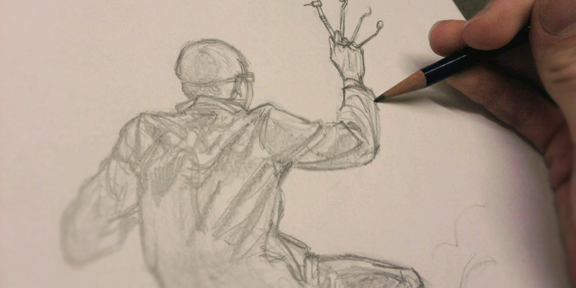
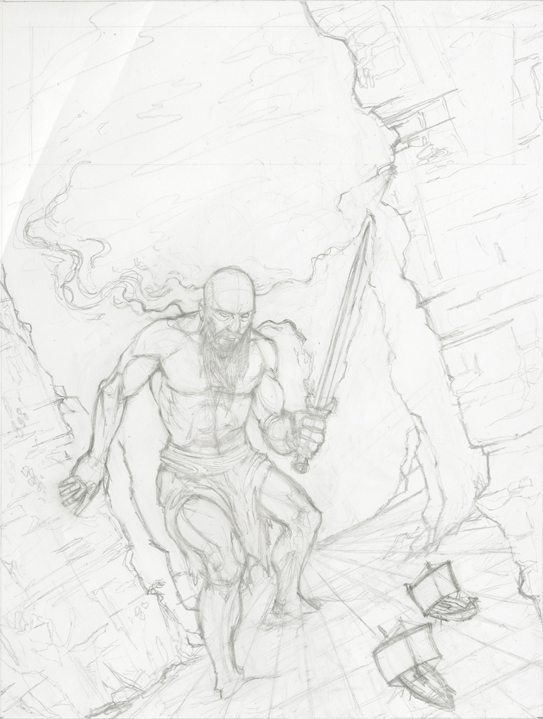
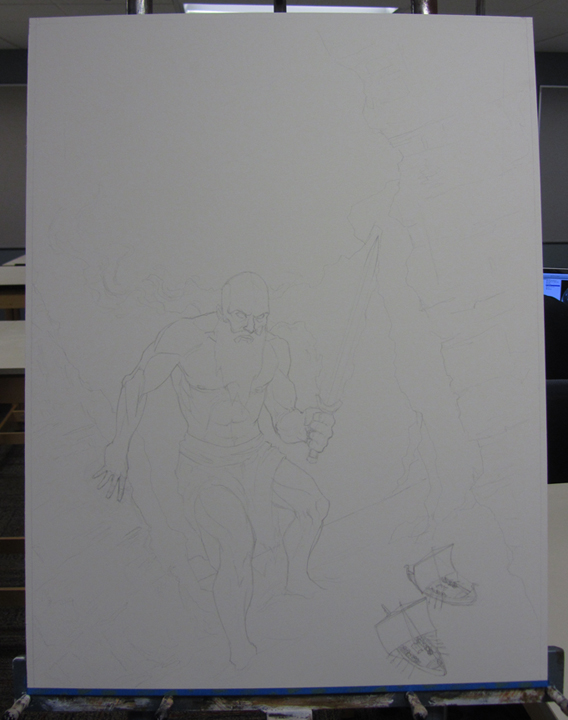
I decided on the design and composition and drew up a larger drawing for the “pencils” stage. Not pictured are the reference photos I took for this illustration. The final pencil drawing is 7.5″ x 10″ (by the way, pretty much all of my art is for sale. If you want some original art, all you need to do is contact me). The pencil drawing is drawn on some horrible shiny paper. I don’t even know why this paper was manufactured. It’s very difficult to make revisions to the drawing because of the slick surface of the paper (also included are creases that I accidentally added to the paper).
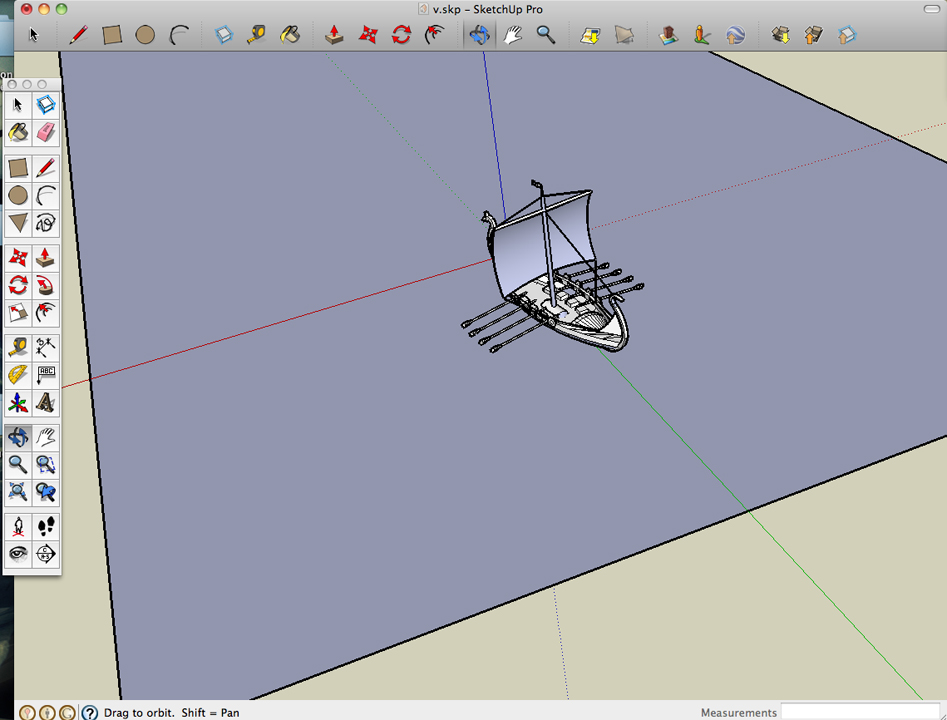
 To figure out how the ships would look I downloaded a Google SketchUp model and used that as reference. When I made this painting I hated SketchUp. That’s mainly because I was only using the trackpad on my laptop instead of a mouse. Tip for anyone using SketchUp: use a mouse (the computer peripheral not the rodent).
Next up I painted a value study for the painting. I find these to be more fun than the actual painting and often times I like them more than the final painting. They have a lot of energy and painterly marks. I scanned the drawing and printed it out on my B&W laser printer. I glued it to cardboard (probably the back of an oatmeal box because I recycle [you should recycle too]). This value study is 6″ x 8″.
I only remembered to take a couple of photos of the illustration in progress.
 The pencil drawing is transferred to the illustration board.
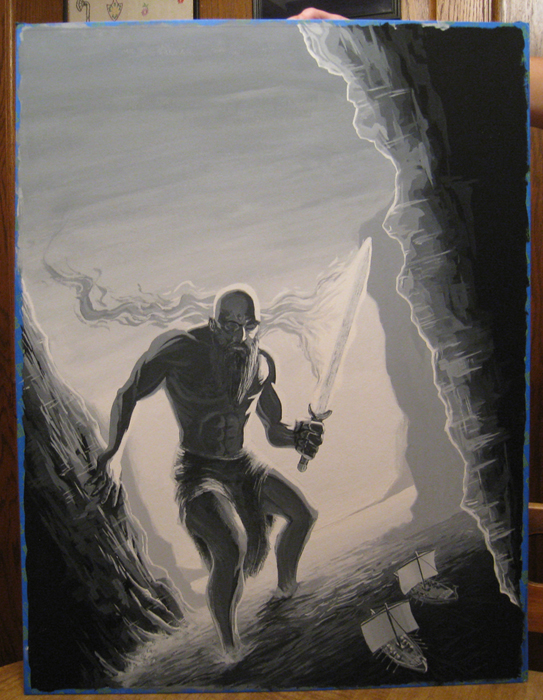 The painting is almost finished.
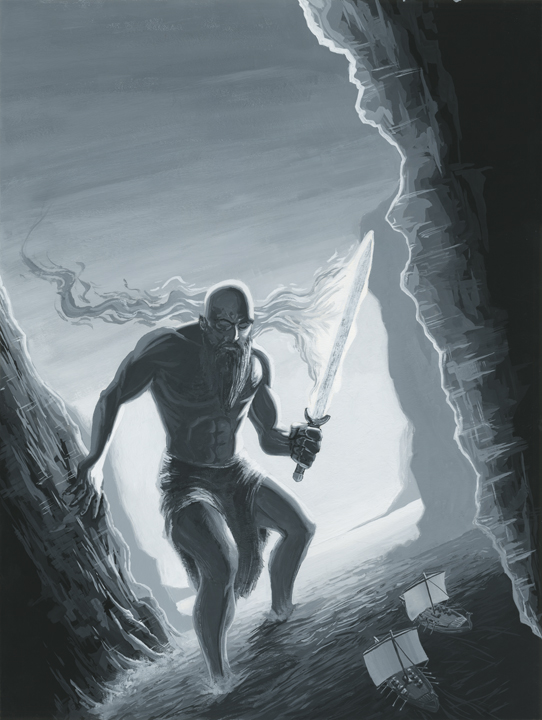 And the painting before text was added.
And that’s it for this episode of my creative process. What do you think? Feel free to leave a comment. Speaking of comments: It has come to my attention that some of the older less-computer-literate readers don’t know how to leave comments. If you are reading my blog on my homepage then you just simply click the gray word bubble next to the title of the blog post (see image below).

If you have clicked on the blog post title, or you are only seeing one blog post with no other posts on the page then you can probably just scroll down the page and you should see a comment box. Congratulations! You now know how to comment! If you want more John VanHouten in your life between blog posts you can follow me on Twitter.